How To Create A Product Reviews Shortcode Query

This particular shortcode will only work on the single product view. Modification would be needed to make it work elsewhere within the website. In case you’re wondering how this would even be useful on product pages, take a look at my article on how beaver builder was added to product pages.


The Shortcode

To do this we set the $product as global in order to grab the id of that product so we can use it in the query arguments. WooCommerce reviews are basically just “comments” so we use get_comments to retrieve these.

Be sure to use ob_start and ob_get_clean or you’ll have some trouble with placement when the output is returned.


The CSS

@media screen and (min-width: 768px) {
  #gs-reviews ul {
   display: flex;
   flex-direction: row-reverse;
   justify-content: space-between;
   list-style: none;
   padding-left: 0;
   margin-bottom: 0;
  }
  #gs-reviews ul > li {
   width: 30%;
   flex-direction: column-reverse;
  }
}


Check out how everything turned out in the image below. In addition, you can read about how I added the “Write your review” link under the product title.

Make Beaver Builder Work on WooCommerce Product Pages

In this particular use case, the Description Tab of the product wasn’t being used; only the “Short Description” which shows up at the top right. The long description shows under the product in the tabs panel. The content area will be placed at the bottom of the page (after the product tabs and before the footer) and able to be edited by Beaver Builder.

Obviously, make sure you have Beaver Builder installed and your post type settings should have “Products” ticked. This article will require you to create a couple template files in your theme directory and add a few lines of code to your functions.php file.

*This does not work well with the Custom Product Tabs for WooCommerce. As of this post date, the plugin itself doesn’t seem to work well with Beaver Builder being activated and used in the main content area.
** See update at bottom for the solution on Custom Product Tabs


Remove Description From The Tabs

What I did was remove the Description Tab from the tab panel so I could utilize the content of that for Beaver Builder. To do this you’ll need to add a filter that unsets the “Description” from that panel.

add_filter( 'woocommerce_product_tabs', 'sd_remove_product_tabs', 98 );
function sd_remove_product_tabs( $tabs ) {
 unset( $tabs['description'] );
 return $tabs;
}


Create The Template Files

Since WooCommerce is constantly updated, you may need to reference the default template files relative to your version number. I’ve used v3.5.0 in this example to copy the template files to my theme and then I’ll add the modifications below. If your theme already has single-product.php and/or content-product.php I’ll be highlighting the code necessary to make this work.


single-product.php

Beaver Builder needs to use the while loop in order to work properly. Without that you wont have any editable regions.

Essentially, we’re just adding the while loop and asking for the contents of content-product.php file inside of that.

<?php
 if ( have_posts() ) :
 while ( have_posts() ) :
 the_post();
 get_template_part( 'content', 'product' );
 endwhile;
 endif; ?>

You can see where I added that to my file below.


content-product.php

This file just wraps the content in Beaver Builder classes and actions.


Update: 

Carlos at Beaver Builder was able to provide a solution to help with Custom Product Tab plugins. I haven’t tested this on all those plugins, but theoretically this should work. Because most of the plugins seemed to use the_content filter to filter and display the content in those tabs, beaver builder was duplicated on the page and tabs. Add this to your functions.php file to remove the filter in the tabs and to make beaver builder work properly on the product page. This particular code is for use with Yikes WooCommerce Custom Product Tabs, so it would need adjusted based on which Tab plugin you’re using.

add_filter ( 'yikes_woo_use_the_content_filter', '__return_false' );


Let me know in the comments below if you have any issues. I’ll do my best to answer questions and help to further add more detail to this article.

How To Add A Fifth Column To Beaver Builder’s Footer Widget Area

Since widgets have been native to the Appearance > Widgets area, I wanted to keep that familiar set up instead of using Beaver Builder’s really cool global rows/sections ability which you could certainly use to achieve the same or similar result.

This article assumes you’re using the Beaver Builder Theme + Child Theme setup. 

I strive to customize things in a way that makes since, works the way you would expect, and is simply logical.

The code below will work in such a way that if Footer Column 5 does not actually contain any widgets, the footer area will be built just as before whether or not you use 1 or 4 columns, it’s still dynamic.


Create The Footer Column 5 Widget

Updated code for adding the widget area:

CARLOS AT BB HELPED ME SORT THE FOOTER COLUMNS TOGETHER INSTEAD OF COLUMN 5 BEING BY ITSELF (as shown in the image above). BELOW IS THE UPDATED CODE FOR ADDING THE WIDGET AREA.

Add this code to your functions.php file. This removes the footer widget areas, so we can add the 5th grouped together with the other 4.

add_action( 'widgets_init', 'gs_custom_widgets', 11 );
function gs_custom_widgets() {
 unregister_sidebar( 'footer-col' );
 unregister_sidebar( 'footer-col-2' );
 unregister_sidebar( 'footer-col-3' );
 unregister_sidebar( 'footer-col-4' );

 if ( 'disabled' != $footer_widgets_display ) {
  register_sidebars( 5, array(
   'name' => _x( 'Footer Column %d', 'Sidebar title. %d stands for the order number of the auto-created sidebar, 5 in total.', 'fl-automator' ),
   'id' => 'footer-col',
   'before_widget' => '<aside id="%1$s" class="fl-widget %2$s">',
   'after_widget' => '</aside>',
   'before_title' => '<h4 class="fl-widget-title">',
   'after_title' => '</h4>',
   ) );
  }
}


Setup 5 Column CSS for Bootstrap

Beaver Builder is built with the most famous Bootstrap which is fantastic. Its only drawback that I seem to always need to compensate for is it’s lack of 5 equal columns in a row that stretch all the way across without have to use push/pull classes. You can add this to your style.css file.

.col-xs-5ths,
.col-sm-5ths,
.col-md-5ths,
.col-lg-5ths {
  position: relative;
  min-height: 1px;
  padding-right: 15px;
  padding-left: 15px;
}

.col-xs-5ths {
  width: 20%;
  float: left;
}

@media (min-width: 768px) {
 .col-sm-5ths {
  width: 20%;
  float: left;
 }
}

@media (min-width: 992px) {
 .col-md-5ths {
  width: 20%;
  float: left;
 }
}

@media (min-width: 1200px) {
 .col-lg-5ths {
  width: 20%;
  float: left;
 }
}

Customize the footer-widgets file to support the 5th column

Lastly, we’re adding some conditional code to that footer-widgets.php file. Since you should be working with a child theme, within your theme folder you’ll want to have an includes folder. Within that, you need to copy the parent theme footer-widgets.php.


The code below checks if the Footer Column 5 is in use, if so we use the new 5ths classes above. If it’s not in use, then it essentially defaults back to using the display_footer_widgets() function.

<div class="fl-page-footer-widgets">
  <div class="fl-page-footer-widgets-container container">
  <div class="fl-page-footer-widgets-row row">
    <?php //FLTheme::display_footer_widgets(); ?>

    <?php if ( is_active_sidebar( 'footer-col-5' ) ) { ?>
      <div class="col-sm-5ths col-md-5ths">
        <?php dynamic_sidebar( 'footer-col' ); ?>
      </div>
      <div class="col-sm-5ths col-md-5ths">
        <?php dynamic_sidebar( 'footer-col-2' ); ?>
      </div>
      <div class="col-sm-5ths col-md-5ths">
        <?php dynamic_sidebar( 'footer-col-3' ); ?>
      </div>
      <div class="col-sm-5ths col-md-5ths">
        <?php dynamic_sidebar( 'footer-col-4' ); ?>
      </div>
      <div class="col-sm-5ths col-md-5ths">
        <?php dynamic_sidebar( 'footer-col-5' ); ?>
      </div>
    <?php } else {?>
      <?php FLTheme::display_footer_widgets(); ?>
    <?php } ?>

   </div>
 </div>
</div><!-- .fl-page-footer-widgets -->

You’re welcome 😉 Now you have a nice footer sitemap with 5 columns.

Did you achieve this differently? I’d love to hear about it in the comments below!


How to Change Beaver Builder Social Icon Style

Beaver Builder has been a great tool that most of my clients are really enjoying using. It makes their experience with their website much less dreadful. There’s so much flexibility for the developer and also for the designer.


I wrote only a couple lines because I didn’t want my social icons to have a background, I felt like the weight of the icons were too heavy and distracting for the area.

The result is the icons inherit the color set for the footer text, and we remove the circle backgrounds.


In addition, if you want to change the size of those icons, just add: font-size: 1.5em; to the i:nth-child(2).

How To Do Modular Custom Page Titles In Beaver Builder

I’m an advocate of modular code and not having to do things twice (or a dozen times). I also actively think about future general changes to a site and a way to do those in as few steps as possible.

Beaver Builder is fantastic for speeding up the productivity of site builds and it’s incredibly user friendly compared to other page builders. It’s also developer friendly too! Meaning you can easily create custom modules of your own.

You could of course use the builder to do custom page titles similarly, which is why by default the settings are to not show the page title. But in my case, I add a background image with an overlay color to the page title using the featured image (code not included on this post), while having a default background if a featured image is not set. Because this is a header with a style that should be uniform across the entire site, there will not be a need to have access to different styles for these. And, for example, if I wanted to change the overlay color of that background image across the site of maybe 50 pages, you can see how mind numbingly tedious that can be, changing a color 50 times. When instead, I could set it with css and change it just once instead. Setting a global style like this also minimizes client error and helps enforce branding guidelines. 

For this particular tutorial, we’ll be using the Beaver Builder Theme with the page builder plugin. You’ll need a basic concept of how child themes work and the theme template structure.

Be sure that your Beaver Builder site has page titles enabled:

  1. In the upper right corner of a Page Builder page, click Tools > Global Settings.
  2. On the General tab, navigate to the Default Page Heading section.
  3. To display the default page heading, set Show to Yes. To hide the default page title, set Show to No.

Create the Meta Box text field

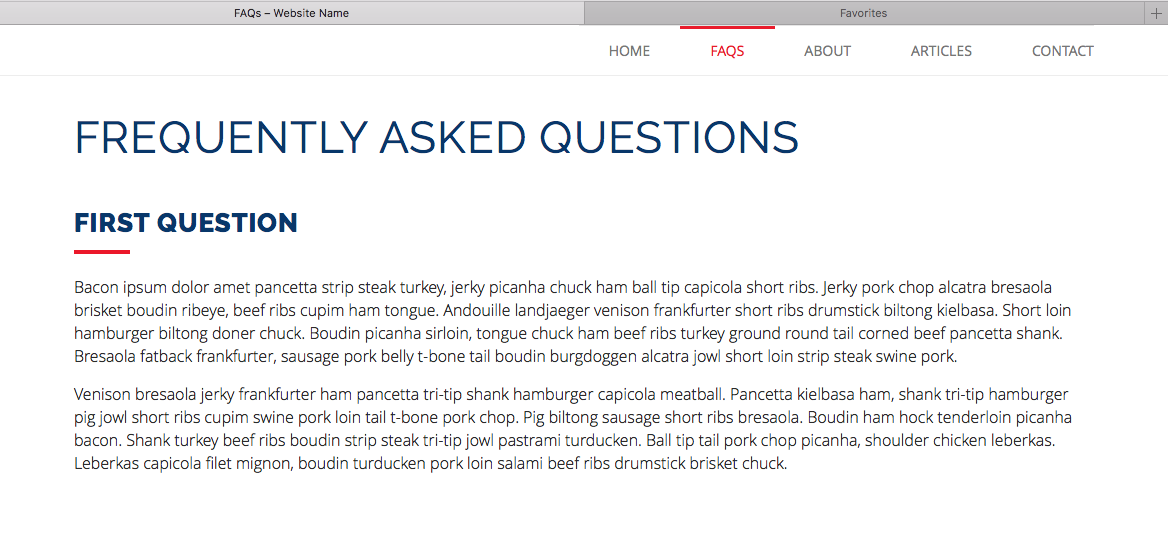
A meta box for inputing a custom page title that would differ from the original. This is useful if you have something like “FAQs” and would like to keep that displays in the browser tab, but would like the abbreviation written out on the page for SEO purposes or display.

Meta boxes are a bit complex, luckily there are a couple good generators for this purpose. I recommend and often use the meta box generator by jeremy hixon.

Add this code to your theme functions.php

function custom_page_heading_get_meta( $value ) {
 global $post;

$field = get_post_meta( $post->ID, $value, true );
 if ( ! empty( $field ) ) {
 return is_array( $field ) ? stripslashes_deep( $field ) : stripslashes( wp_kses_decode_entities( $field ) );
 } else {
 return false;
 }
}

function custom_page_heading_add_meta_box() {
 add_meta_box(
 'custom_page_heading-custom-page-heading',
 __( 'Custom Page Title', 'custom_page_heading' ),
 'custom_page_heading_html',
 'page',
 'normal',
 'high'
 );
}
add_action( 'add_meta_boxes', 'custom_page_heading_add_meta_box' );

function custom_page_heading_html( $post) {
 wp_nonce_field( '_custom_page_heading_nonce', 'custom_page_heading_nonce' ); ?>

<p>
 <label for="custom_page_heading_custom_page_title"><?php _e( 'Custom Page Title', 'custom_page_heading' ); ?></label><br>
 <input type="text" style="width:100%;" name="custom_page_heading_custom_page_title" id="custom_page_heading_custom_page_title" value="<?php echo custom_page_heading_get_meta( 'custom_page_heading_custom_page_title' ); ?>">
 </p><?php
}

function custom_page_heading_save( $post_id ) {
 if ( defined( 'DOING_AUTOSAVE' ) && DOING_AUTOSAVE ) return;
 if ( ! isset( $_POST['custom_page_heading_nonce'] ) || ! wp_verify_nonce( $_POST['custom_page_heading_nonce'], '_custom_page_heading_nonce' ) ) return;
 if ( ! current_user_can( 'edit_post', $post_id ) ) return;

if ( isset( $_POST['custom_page_heading_custom_page_title'] ) )
 update_post_meta( $post_id, 'custom_page_heading_custom_page_title', esc_attr( $_POST['custom_page_heading_custom_page_title'] ) );
}
add_action( 'save_post', 'custom_page_heading_save' );

You’ll now have a nice text box when you edit your page.

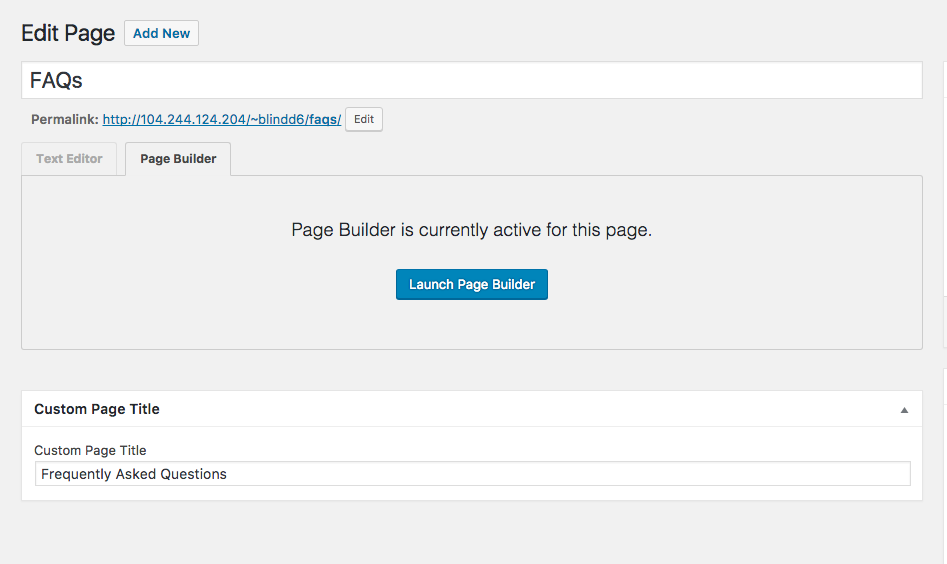
Customize the content-page.php

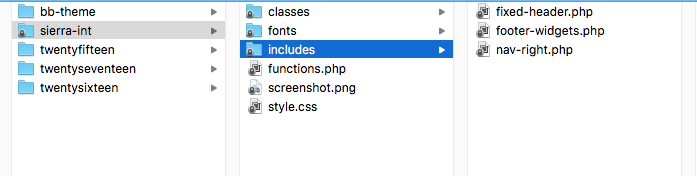
Next, we’ll be editing the content-page.php. Copy this file from the parent theme and into your child theme.

By default, the page title is contained in a header block:

 <?php if ( FLTheme::show_post_header() ) : ?>
 <header class="fl-post-header">
 <h1 class="fl-post-title" itemprop="headline"><?php the_title(); ?></h1>
 <?php edit_post_link( _x( 'Edit', 'Edit page link text.', 'fl-automator' ) ); ?>
 </header><!-- .fl-post-header -->
 <?php endif; ?>

We can now use the custom_page_heading_get_meta function we added earlier to set up the meta box to grab the custom title and store it in a variable:

$custom_page_title = custom_page_heading_get_meta( 'custom_page_heading_custom_page_title' );

Now it’s just a matter of creating addition conditional statements to show the custom title if the value is not empty, otherwise show the default page title.

I never use the page title like this on the homepage, so I also created an addition statement that does not allow this entire block to show if this is shown for the homepage:

if ( !is_front_page() ) :

Our end result looks like this:

 <header class="fl-post-header">
 <?php
 if ( !is_front_page() ) :
 $custom_page_title = custom_page_heading_get_meta( 'custom_page_heading_custom_page_title' );
 ?>

 <h1 class="fl-post-title" itemprop="headline">
 <?php
 if (!empty ($custom_page_title)) :
 echo $custom_page_title;
 else :
 echo $the_title();
 endif;
 ?>

 </h1>
 <?php
 endif;
 ?>
 <?php edit_post_link( _x( 'Edit', 'Edit page link text.', 'fl-automator' ) ); ?>
 </header><!-- .fl-post-header -->